Easy Homemade Bread Recipe | Soft & Fluffy White Bread from Scratch
Calories 202kcal
Equipment
- Large mixing bowl
- Wooden spoon or dough whisk
- Measuring cups and spoons
- Kitchen scale (optional for accuracy)
- Two 9×5-inch loaf pans
- Plastic wrap or clean kitchen towel
- Cooling rack
Ingredients
- 2 cups warm water (105–115°F)
- 1 tablespoon active dry yeast
- ¼ cup honey or granulated sugar
- 2 teaspoons salt
- 2 tablespoons vegetable or canola oil
- 4 to 5½ cups bread flour or all-purpose flour
Notes
Homemade Bread Recipe – Soft, Fluffy & Easy Bread for Beginners
Homemade Bread Recipe | Soft, Fluffy & Easy White Bread from Scratch Homemade bread with simple pantry ingredients. This easy bread recipe is perfect for beginners, freezer-friendly, and creates two delicious loaves with a golden crust.Homemade Bread Recipe – The Ultimate Guide to Baking Soft and Fluffy Bread at Home
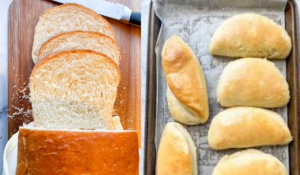
Homemade Bread Recipe, Nothing compares to the comforting aroma of freshly baked homemade bread filling your kitchen. Warm, soft, and perfectly golden, homemade bread offers a flavor and texture that store-bought loaves simply cannot match. Whether you’re making sandwiches, toast, garlic bread, or serving slices alongside your favorite soup, this easy bread recipe delivers consistently delicious results every time. One of the best things about this recipe is its simplicity. It uses everyday pantry staples that are easy to find, making it ideal for anyone who enjoys baking from scratch. There’s no need for expensive equipment or specialty ingredients. Even if you’re baking bread for the first time, you’ll find the process straightforward and rewarding. This foolproof homemade bread recipe creates two beautiful loaves with a soft interior, a tender crumb, and a lightly crisp crust. Once you’ve experienced the taste of freshly baked bread, you’ll want to make it part of your regular baking routine.Why You’ll Love This Homemade Bread Recipe
This recipe has become a favorite for home bakers because it combines simplicity with consistently excellent results.Beginner-Friendly
Even if you’ve never baked bread before, this recipe walks you through each stage with confidence. The dough is easy to work with and forgiving, making it perfect for first-time bakers.Everyday Pantry Ingredients
You don’t need milk, eggs, or complicated ingredients. Everything required can usually be found in your kitchen pantry.Soft and Fluffy Texture
The finished bread is incredibly soft inside while developing a beautifully golden crust during baking.Perfect for Every Meal
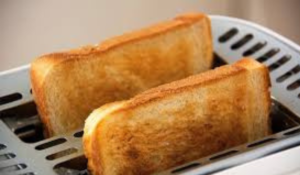
Fresh homemade bread is incredibly versatile and can be enjoyed as:- Breakfast toast
- Sandwich bread
- Garlic bread
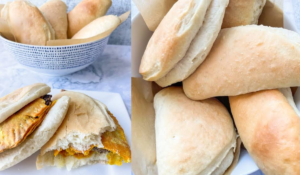
- Dinner rolls
- French toast
- Bread pudding
- Grilled cheese
- Soup companion
- Homemade breadcrumbs
Freezer Friendly
Bake extra loaves and freeze them for future meals. Properly stored homemade bread maintains excellent quality for several months.What Makes Homemade Bread Better Than Store-Bought?
Fresh bread made at home offers several advantages.- No unnecessary preservatives
- Fresh ingredients you can trust
- Better flavor
- Softer texture
- Customizable sweetness and salt levels
- Budget-friendly
- Ideal for meal preparation
- Enjoy warm right from the oven
Ingredients for Homemade Bread
This recipe uses only a handful of classic baking ingredients.Warm Water
Warm water activates the yeast and begins the fermentation process. Aim for a temperature between 105°F and 115°F (40°C–46°C). Water that’s too hot may damage the yeast, while water that’s too cool can slow the rising process.Active Dry Yeast
Yeast is the key ingredient that gives bread its light and airy texture. Fresh yeast produces the most reliable rise, so always check the expiration date before baking. If using instant yeast, you can usually mix it directly with the dry ingredients rather than proofing it separately.Sugar or Honey
A small amount of sugar or honey feeds the yeast during activation while also contributing to a softer loaf and subtle sweetness. Honey adds a mild richness, while granulated sugar creates a more neutral flavor.Salt
Salt balances the flavor and helps strengthen the gluten structure, resulting in a better loaf with improved texture. Avoid placing salt directly on top of yeast during mixing, as concentrated salt may reduce yeast activity.Vegetable Oil
Oil helps keep the bread moist and soft while extending freshness. Suitable options include:- Vegetable oil
- Canola oil
- Sunflower oil
- Light olive oil
- Melted butter
Flour
Both bread flour and all-purpose flour work beautifully. Bread Flour- Higher protein
- Stronger gluten
- Slightly chewier texture
- Excellent oven spring
- Readily available
- Soft crumb
- Easy to work with
- Great for everyday baking
Equipment You’ll Need
No expensive appliances are necessary. Recommended kitchen tools include:- Large mixing bowl
- Wooden spoon or dough whisk
- Measuring cups and spoons
- Kitchen scale (optional for accuracy)
- Two 9×5-inch loaf pans
- Plastic wrap or clean kitchen towel
- Cooling rack
Ingredient Measurements
This recipe makes 2 standard sandwich loaves.Ingredients
- 2 cups warm water (105–115°F)
- 1 tablespoon active dry yeast
- ¼ cup honey or granulated sugar
- 2 teaspoons salt
- 2 tablespoons vegetable or canola oil
- 4 to 5½ cups bread flour or all-purpose flour
Expert Tips for Perfect Homemade Bread
1. Use Fresh Yeast
Fresh yeast is essential for proper rising. If your yeast fails to foam during proofing, replace it before continuing.2. Measure Flour Carefully
Adding excessive flour creates dense, heavy bread. For the best results:- Spoon flour into the measuring cup.
- Level it with a knife.
- Avoid packing flour tightly.
3. Knead Until Smooth
Proper kneading develops gluten, giving bread its structure and chewiness. Well-kneaded dough should stretch easily without tearing.4. Let the Dough Rise Completely
Don’t rush the rising stages. The dough should roughly double in size before shaping.5. Bake Until Golden Brown
Finished bread should have:- Deep golden color
- Firm crust
- Hollow sound when tapped underneath
- Internal temperature around 190–200°F (88–93°C) if using a thermometer
Can You Make Bread Without a Stand Mixer?
Absolutely. Many experienced bakers prefer mixing and kneading dough by hand because it allows them to better understand the dough’s consistency. Simply combine the ingredients in a large bowl, then knead on a lightly floured work surface for about 6–8 minutes until the dough becomes smooth and elastic. A bread machine can also be used if it has enough capacity, although smaller models may require preparing only half of the recipe.Common Mistakes to Avoid
Avoid these common issues for consistently successful homemade bread:- Using expired yeast
- Water that is too hot or too cold
- Adding too much flour
- Skipping the kneading process
- Underproofing the dough
- Overproofing before baking
- Opening the oven repeatedly during baking
- Cutting the bread while it’s still very hot
Is Homemade Bread Healthy?
Homemade bread allows you to control every ingredient that goes into your loaf. Since it contains no unnecessary preservatives or artificial additives, many home bakers appreciate its fresh taste and simple ingredient list. You can also adapt the recipe to suit your preferences by using whole-grain flour blends, reducing added sugar, or incorporating seeds, herbs, and other wholesome ingredients. In the next part, you’ll learn exactly how to prepare the dough, knead it correctly, proof it, bake two beautiful loaves, store bread for maximum freshness, freeze it successfully, create delicious recipe variations, and discover creative ways to use leftover bread.How to Make Homemade Bread Step by Step
Now that you have your ingredients ready, it’s time to transform them into two beautiful loaves of soft, golden bread. Follow these easy steps for reliable results, even if it’s your first time baking bread.Step 1: Activate the Yeast
Pour the warm water into a large mixing bowl. Add the active dry yeast along with a small pinch of the sugar or honey. Let the mixture sit undisturbed for 5–10 minutes. If the yeast is fresh, you’ll notice a thick, foamy layer forming on top. This means the yeast is active and ready to use. If nothing happens after 10 minutes:- Check that the water wasn’t too hot or too cold.
- Make sure your yeast hasn’t expired.
- Start again with fresh yeast if necessary.
Step 2: Mix the Dough
Once the yeast becomes foamy, stir in the remaining sugar or honey, salt, vegetable oil, and about three cups of flour. Mix until everything is well combined. Gradually add more flour, about half a cup at a time, until the dough begins pulling away from the sides of the bowl. Keep in mind that flour absorbs moisture differently depending on humidity and the type of flour used. You may not need the full amount listed. The dough should feel:- Soft
- Smooth
- Elastic
- Slightly sticky but easy to handle
Step 3: Knead the Dough
Transfer the dough onto a lightly floured surface. Knead it for 5–8 minutes using the heels of your hands. If using a stand mixer, knead with the dough hook on medium speed for about 5 minutes. Properly kneaded dough should:- Stretch without tearing
- Feel smooth
- Bounce back when gently pressed
- Form a soft, elastic ball
Step 4: First Rise
Lightly grease a large bowl with oil. Place the dough inside and turn it once so all sides are lightly coated. Cover the bowl with plastic wrap or a clean kitchen towel. Let it rise in a warm, draft-free area for approximately 1½ hours, or until doubled in size.Quick Rising Tip
If your kitchen is cool:- Warm your oven briefly, then turn it off.
- Place the covered bowl inside.
- Leave the oven door slightly open.
Step 5: Punch Down the Dough
Once the dough has doubled, gently press it down to release trapped air. This step helps create an even crumb and prevents large air pockets inside the finished bread.Step 6: Shape the Loaves
Divide the dough into two equal portions. Shape each piece into a smooth rectangle, then roll it tightly into a loaf. Pinch the seam closed and place each loaf seam-side down into a lightly greased 9 × 5-inch loaf pan. Proper shaping helps the bread rise evenly and gives it an attractive appearance.Step 7: Second Rise
Cover the pans loosely with lightly greased plastic wrap or a clean towel. Allow the dough to rise again for 45–60 minutes. The dough is ready to bake when it rises about 1 inch above the edge of the loaf pan. Do not let the dough overproof, or it may collapse while baking.Step 8: Bake to Golden Perfection
Preheat your oven to 350°F (175°C). Bake the loaves for 30–33 minutes. You’ll know the bread is done when:- The crust is golden brown.
- The loaf sounds hollow when tapped on the bottom.
- The internal temperature reaches about 190–200°F (88–93°C).
Step 9: Cool Before Slicing
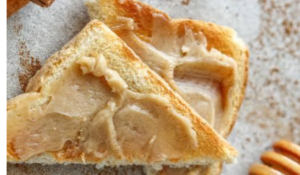
Remove the bread from the pans immediately after baking. Place the loaves on a wire rack to cool. For a softer crust, brush the tops lightly with melted butter while still warm. Allow the bread to cool for at least 15–20 minutes before slicing. Although it’s tempting to cut into warm bread right away, cooling helps the crumb set properly.Helpful Baking Tips
Small adjustments can make a big difference.- Use room-temperature ingredients whenever possible.
- Measure flour carefully instead of scooping directly from the bag.
- Keep dough covered while rising to prevent drying.
- Avoid adding extra flour unless necessary.
- Bake on the center oven rack for even browning.
- Rotate the pans only if your oven has noticeable hot spots.
Delicious Homemade Bread Variations
Once you’ve mastered the basic recipe, try these flavorful twists.Cinnamon Swirl Bread
Roll each portion of dough into a rectangle. Sprinkle with a mixture of:- ¼ cup sugar
- 2 teaspoons ground cinnamon
Raisin Bread
Mix 2 cups of raisins into the dough before kneading. You can also add a touch of cinnamon for extra flavor.Herb Bread
Fold dried herbs such as:- Rosemary
- Thyme
- Oregano
- Basil
Cheese Bread
Mix shredded cheddar, mozzarella, or Parmesan into the dough before shaping for a rich, savory variation.Whole Wheat Blend
Replace part of the all-purpose flour with whole wheat flour for a heartier loaf while maintaining a soft texture.Creative Ways to Use Leftover Bread
Homemade bread stays freshest for the first few days, but slightly stale bread can still become delicious meals. Ideas include:- Homemade French toast
- Bread pudding
- Garlic toast
- Breakfast casserole
- Crispy croutons
- Stuffing
- Homemade breadcrumbs
- Grilled cheese sandwiches
- Bruschetta
- Bread pizza
Storage Instructions
Once completely cooled, store bread in:- An airtight bread box
- A reusable bread bag
- A sealed food-storage container
- Room temperature: 2–3 days
- Refrigerator: Up to 5 days
How to Freeze Homemade Bread
Fresh bread freezes exceptionally well.Freeze Baked Bread
- Cool the loaves completely.
- Wrap tightly in plastic wrap.
- Place in a freezer-safe bag.
- Freeze for up to 3 months.
Freeze Bread Dough
Prepare and shape the dough, then place it into loaf pans. Wrap tightly and freeze for up to 3 months. When ready to bake:- Thaw overnight.
- Allow the dough to complete its second rise.
- Bake as instructed.
Nutrition Information (Approximate Per Slice)
- Calories: 202
- Carbohydrates: 41 g
- Protein: 5 g
- Fat: 2 g
- Saturated Fat: 1 g
- Fiber: 1 g
- Sugar: 3 g
- Sodium: 196 mg
Frequently Asked Questions
Why didn’t my bread rise?
Common reasons include expired yeast, water that was too hot or too cold, or insufficient rising time.Can I use instant yeast?
Yes. Mix instant yeast directly with the dry ingredients and reduce the rise time slightly.Which flour works best?
Both bread flour and all-purpose flour produce excellent results. Bread flour creates a slightly chewier texture.Can I make the dough ahead of time?
Yes. After mixing, refrigerate the dough overnight. Bring it to room temperature before shaping and baking.Why is my bread dense?
Dense bread is often caused by adding too much flour, under-kneading, or not allowing enough time for the dough to rise.How do I know when bread is fully baked?
A fully baked loaf has a golden crust, sounds hollow when tapped, and reaches an internal temperature of approximately 190–200°F (88–93°C).Can I bake this recipe without a stand mixer?
Absolutely. Mixing and kneading by hand works just as well.Can I double the recipe?
Yes. Ensure you have enough mixing space and loaf pans, and avoid overcrowding the oven.Final Thoughts
Making homemade bread is one of the most rewarding baking experiences. With just a handful of pantry ingredients and a little patience, you can create soft, fluffy loaves that are perfect for breakfast, sandwiches, family dinners, or freezing for later. Once you master this easy recipe, you’ll discover endless ways to customize it with herbs, spices, dried fruits, seeds, or cheese. Homemade bread is fresher, more flavorful, and often more economical than store-bought alternatives. Whether you’re a beginner or an experienced baker, this recipe is designed to deliver dependable results every time. Enjoy each warm slice with butter, jam, or your favorite toppings, and share the joy of freshly baked bread with family and friends.