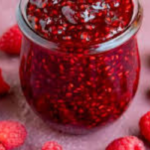
Blackberry Jam Recipes
Recipe InformationDetailsRecipe NameHomemade Blackberry JamRecipe TypeRefrigerator Fruit JamServingsAbout ¾ cup (6–8 servings)Estimated Cost$5.50–$8.00Preparation Time1 Hour 5 MinutesCooking Time30 MinutesTotal TimeAbout 1 Hour 35 MinutesDifficultyEasyCourseBreakfast, Brunch, Dessert, SnackCuisineAmericanKeywordsBlackberry Jam Recipe, Homemade Jam, Refrigerator Jam, Berry Jam, Breakfast Spread, Easy Fruit PreserveCaloriesApproximately 45 calories per tablespoon
Calories 45kcal
Cost $5.50–$8.00
Notes
Blackberry Jam Recipes – Easy Homemade Blackberry Jam That Bursts with Fresh Berry Flavor
Blackberry Jam Recipe with fresh blackberries, lemon, and sugar. Learn how to make delicious refrigerator jam with easy step-by-step instructions, nutrition facts, storage tips, flavor variations, and expert techniques for perfect results every time.Blackberry Jam Recipes
Nothing compares to the taste of homemade blackberry jam. Every spoonful is filled with the sweet and slightly tart flavor of fresh blackberries, creating a delicious spread that transforms simple breakfasts and desserts into something special. Whether you spread it over warm sourdough toast, swirl it into yogurt, top pancakes, or use it as a cake filling, blackberry jam is a versatile recipe that every home cook should learn. One of the greatest advantages of homemade blackberry jam is its simplicity. Unlike many traditional jam recipes that require commercial pectin, this recipe relies on the natural pectin found in blackberries. Combined with fresh lemon juice, the fruit naturally thickens into a rich, glossy jam with an irresistible texture. This refrigerator-style blackberry jam is designed for convenience. It requires no complicated canning equipment, making it perfect for beginners. The jam is ready in about one hour and can be stored safely in the refrigerator for up to three weeks. If desired, the recipe can also be adapted for traditional water-bath canning for longer storage. Another wonderful feature of blackberry jam is how easily it can be customized. Simple ingredients create an excellent classic version, but optional additions such as vanilla, citrus zest, ginger, thyme, sage, cardamom, or orange blossom water can add exciting layers of flavor while allowing the blackberry to remain the star. In this complete guide, you’ll learn everything about making blackberry jam—from selecting the best berries and preparing the fruit to cooking techniques, storage methods, serving ideas, and expert tips for perfect results every time.Recipe Summary
| Recipe Information | Details |
|---|---|
| Recipe Name | Homemade Blackberry Jam |
| Recipe Type | Refrigerator Fruit Jam |
| Servings | About ¾ cup (6–8 servings) |
| Estimated Cost | $5.50–$8.00 |
| Preparation Time | 1 Hour 5 Minutes |
| Cooking Time | 30 Minutes |
| Total Time | About 1 Hour 35 Minutes |
| Difficulty | Easy |
| Course | Breakfast, Brunch, Dessert, Snack |
| Cuisine | American |
| Keywords | Blackberry Jam Recipe, Homemade Jam, Refrigerator Jam, Berry Jam, Breakfast Spread, Easy Fruit Preserve |
| Calories | Approximately 45 calories per tablespoon |
Why You’ll Love This Blackberry Jam Recipe
There are many reasons why this homemade blackberry jam deserves a permanent place in your kitchen.- Made with simple pantry ingredients.
- No commercial pectin required.
- Rich natural blackberry flavor.
- Easy recipe for beginners.
- Perfect balance of sweetness and tartness.
- Ready in just over one hour.
- Great for breakfast, desserts, and baking.
- Easy to customize with herbs and spices.
- No artificial colors or preservatives.
- A thoughtful homemade gift for friends and family.
What Does Blackberry Jam Taste Like?
Blackberry jam has a wonderfully balanced flavor. It combines the natural sweetness of ripe berries with a pleasant tart finish that keeps the jam from tasting overly sugary. Its texture is smooth yet slightly rustic, depending on how much you mash the berries during cooking. Tiny blackberry seeds add a traditional homemade character, while slow cooking concentrates the fruit’s natural richness. Optional flavor additions create exciting variations:- Vanilla adds warmth and sweetness.
- Lemon zest creates a brighter citrus aroma.
- Ginger offers a fresh, lightly spicy finish.
- Cardamom adds subtle floral warmth.
- Orange blossom water provides delicate fragrance.
- Grand Marnier contributes elegant orange notes.
- Fresh thyme or sage adds herbal complexity.
Health Benefits of Blackberry Jam
Although blackberry jam contains sugar, it also retains many of the nutritional qualities of blackberries.Rich in Antioxidants
Blackberries are naturally high in anthocyanins, powerful antioxidants that help protect the body’s cells from oxidative stress.Good Source of Vitamin C
Vitamin C supports immune health, collagen production, and healthy skin.Natural Fiber
The berry pulp and seeds provide small amounts of dietary fiber, which supports healthy digestion.Contains Essential Minerals
Blackberries naturally provide manganese, potassium, magnesium, and vitamin K, all of which contribute to overall wellness.Homemade Means Better Ingredient Control
Preparing jam at home lets you adjust the sugar level and avoid artificial preservatives, colors, or flavorings often found in commercial products.
Ingredients
Main Ingredients
- 1 pound (2 pints) fresh blackberries or frozen blackberries, thawed
- ¾ cup granulated sugar
- 2 tablespoons fresh lemon juice
- ¼ teaspoon kosher salt
Optional Flavor Enhancers (Choose One or Two)
- ¼ teaspoon ground cardamom
- ½ teaspoon orange blossom water
- 1 teaspoon vanilla extract
- 1 tablespoon freshly grated ginger
- 1 tablespoon finely grated lemon, orange, or grapefruit zest
- 1 teaspoon orange liqueur (optional)
- 3 fresh sage leaves
- 3 sprigs fresh thyme
Blackberry Jam Recipes
Equipment You’ll Need
One of the best things about making homemade blackberry jam is that you don’t need expensive equipment. Most kitchens already have everything required.Essential Equipment
- Medium heavy-bottom saucepan
- Wooden spoon or silicone spatula
- Potato masher or fork (optional)
- Measuring cups
- Measuring spoons
- Citrus juicer
- Fine grater or zester (if using citrus zest)
- Clean glass mason jar with lid
- Kitchen towel
- Small plate (for testing the jam)
Optional Equipment
- Fine mesh strainer (for seedless jam)
- Digital kitchen thermometer
- Water bath canner (for long-term canning)
- Wide-mouth funnel
- Jar lifter
How to Choose the Best Blackberries
The quality of your berries has the biggest impact on the finished jam.Fresh Blackberries
Choose berries that are:- Deep purple to black
- Firm but juicy
- Plump and shiny
- Sweet-smelling
- Free from mold or bruises
Frozen Blackberries
Frozen berries work just as well as fresh berries. Simply thaw them completely and include all of the juices released during thawing. Those juices contain natural flavor and pectin that help the jam thicken.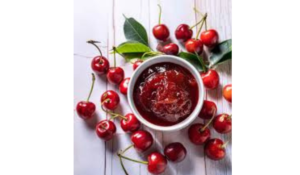
Why This Recipe Doesn’t Need Pectin
Many traditional jam recipes require commercial pectin to help the fruit set. Fortunately, blackberries naturally contain a generous amount of pectin. When combined with sugar and fresh lemon juice, the natural pectin forms a beautifully thick jam without needing additional ingredients. Lemon juice also increases acidity, helping activate the fruit’s natural pectin while adding brightness that balances the sweetness.Step-by-Step Instructions
Step 1 – Prepare the Fruit
Wash fresh blackberries gently under cool water. Remove any stems, leaves, or damaged berries. If using frozen berries, thaw them completely before beginning. Place the berries into a medium saucepan.Step 2 – Add Sugar
Pour the granulated sugar over the berries. Gently stir everything together until the berries are evenly coated. Allow the mixture to rest for 30 minutes to 3 hours at room temperature. This process is called maceration. During this time, the sugar pulls natural juices from the berries, creating a flavorful syrup before cooking begins.Step 3 – Begin Cooking
Place the saucepan over medium-high heat. Slowly bring the berry mixture to a gentle boil. Stir frequently to prevent sticking. As the berries soften, gently mash them with a wooden spoon or potato masher. You can mash them completely for a smoother jam or leave small fruit pieces for a chunkier texture.Step 4 – Reduce the Jam
Continue cooking for about 15–20 minutes. Stir frequently, scraping the bottom of the pan to prevent burning. As moisture evaporates, the mixture gradually becomes thicker. The bubbles will also become slower and larger, indicating the jam is nearing the correct consistency.Step 5 – Add Lemon Juice and Salt
Reduce the heat to medium-low. Add:- Fresh lemon juice
- Kosher salt
Step 6 – Add Optional Flavors
Once the jam has thickened, stir in your chosen flavor additions. Excellent combinations include:Combination One
- Ground cardamom
- Orange liqueur
Combination Two
- Fresh ginger
- Fresh sage
Combination Three
- Lemon zest
- Fresh thyme
Combination Four
- Vanilla extract
- Grapefruit zest
Step 7 – Cool the Jam
Remove the saucepan from the heat. If using thyme or sage, allow the herbs to steep for about 30 minutes before removing and discarding them. Let the jam cool slightly. It will continue thickening as it cools.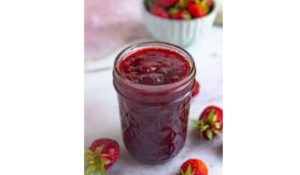
Step 8 – Transfer to a Jar
Pour the finished jam into a clean mason jar. Leave approximately ½ inch of space between the jam and the lid. Seal tightly. Allow the jar to cool completely before refrigerating.How to Know When Blackberry Jam Is Ready
One of the biggest questions beginners ask is: “How do I know when my jam has finished cooking?” Here are several reliable methods.Spoon Test
Dip a spoon into the jam. Lift it above the saucepan. Instead of dripping like syrup, properly cooked jam falls slowly in thick sheets.Cold Plate Test
Before cooking, place a small plate inside the freezer. When you think the jam is finished:- Spoon a little onto the cold plate.
- Wait one minute.
- Push it gently with your finger.
Temperature Test
If using a thermometer, the jam usually reaches its setting point at approximately 220°F (104°C) at sea level.
Pro Tips for Perfect Blackberry Jam
- Use fully ripe berries for maximum sweetness.
- Stir frequently to prevent scorching.
- Avoid cooking over very high heat.
- Don’t rush the maceration process.
- Add lemon juice near the end of cooking.
- Let the jam cool naturally before judging its thickness.
- Sterilize jars for better freshness.
- Label jars with the preparation date.
- Store only in clean, dry containers.
- Use a clean spoon every time you serve the jam.